TOOLS · COOKIE BANNER
Add a cookie banner
A privacy-first consent bar for your website. It sets no tracking cookies of its own and works the moment you add it. About 4 minutes.
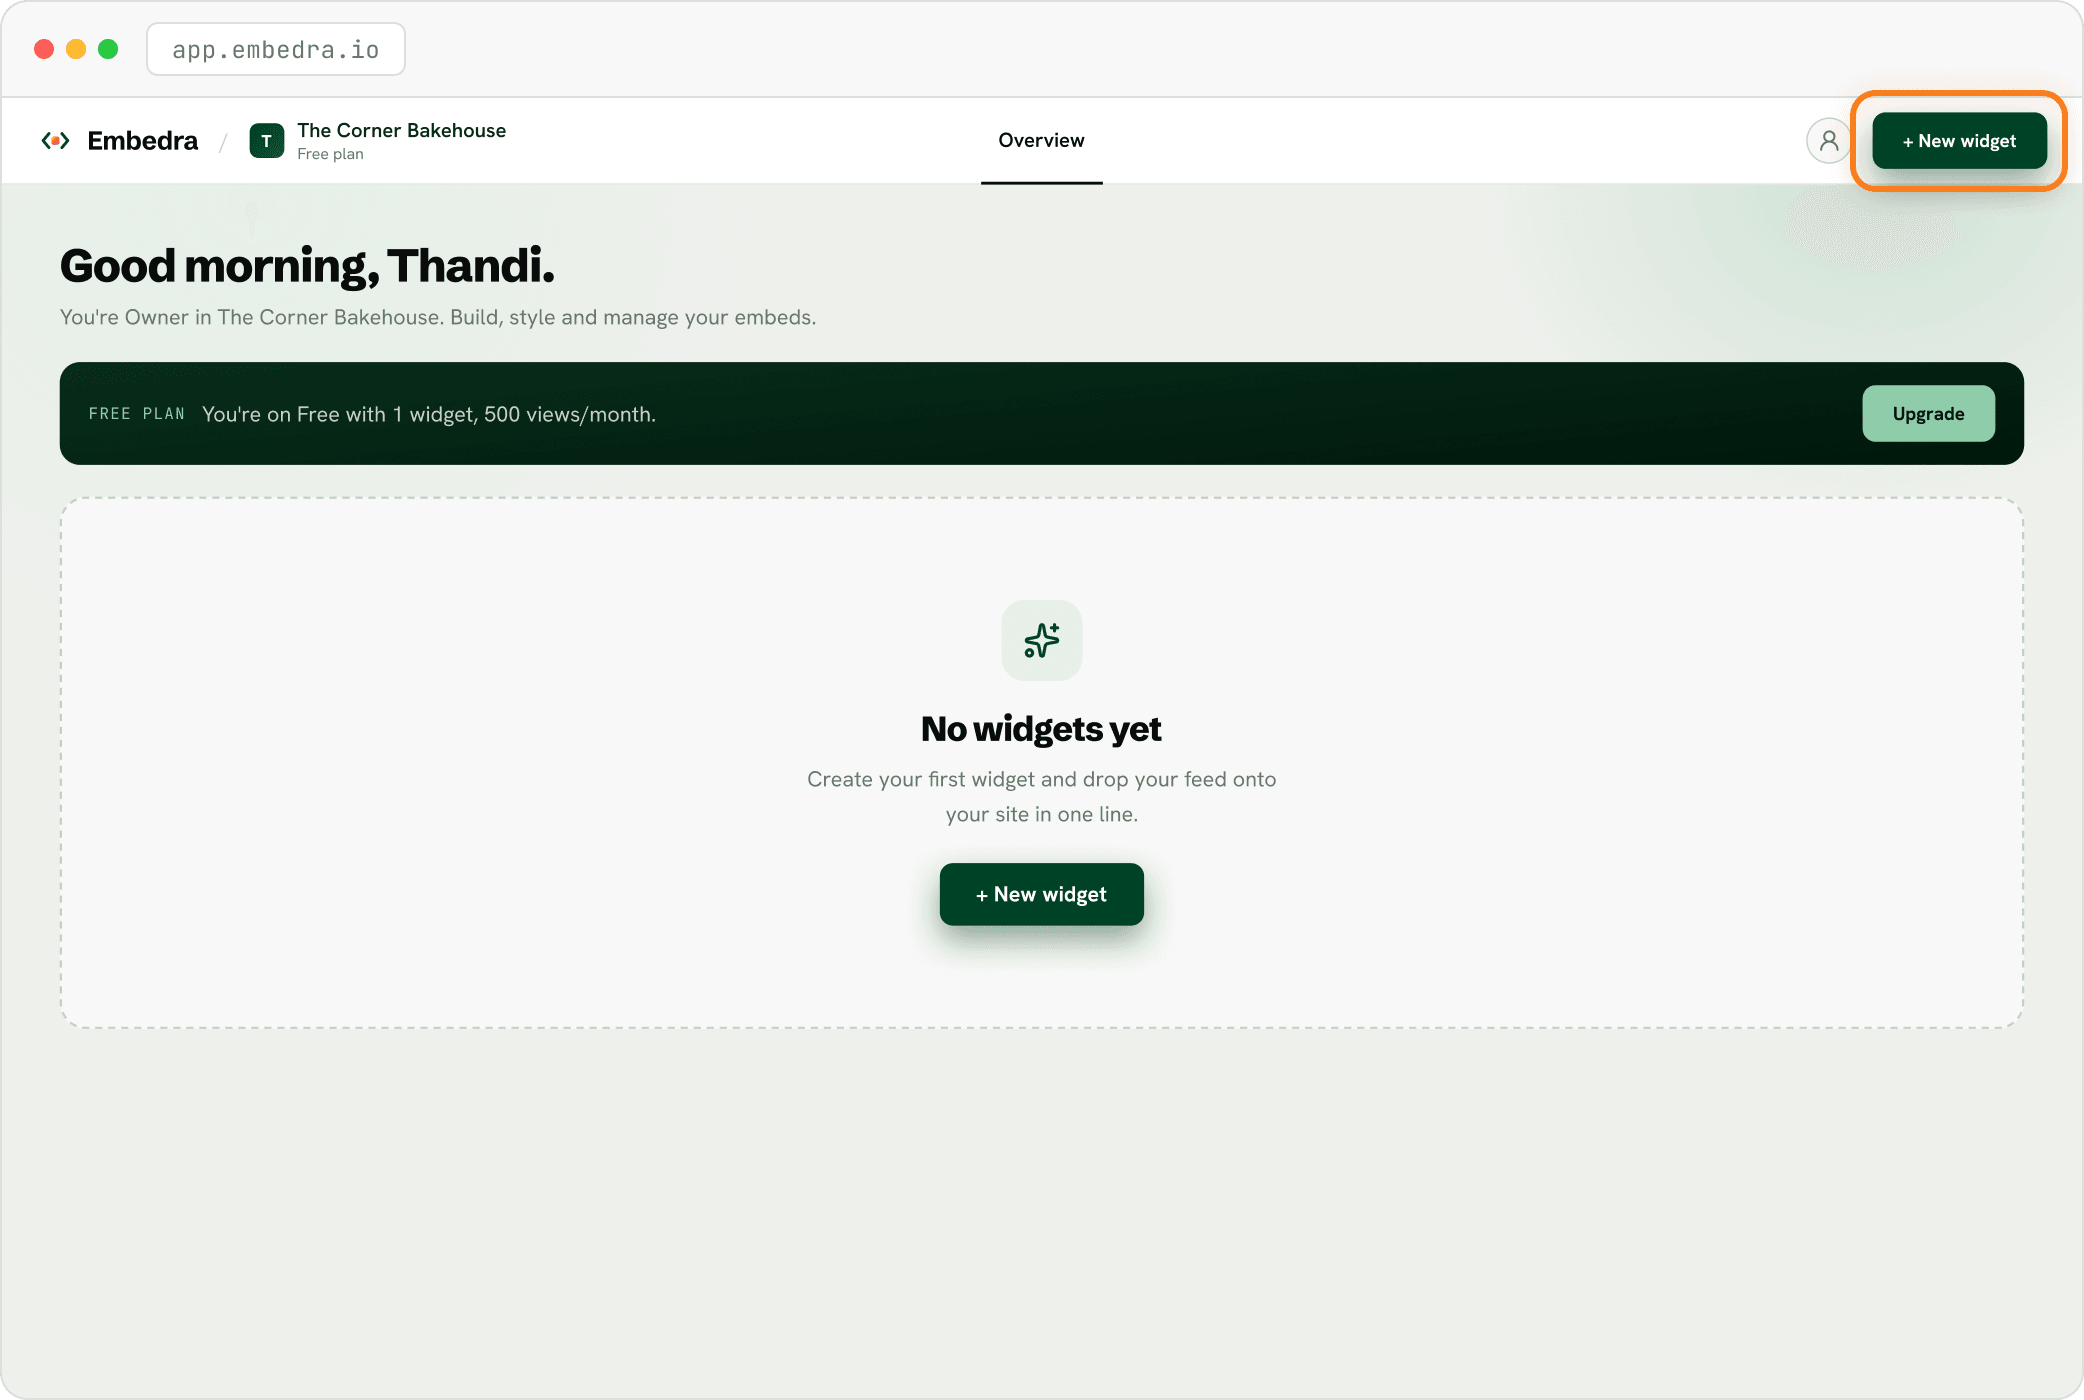
Click "+ New widget"
Sign in at app.embedra.io. On your dashboard, click "+ New widget" at the top. A window called "Add a widget" opens.
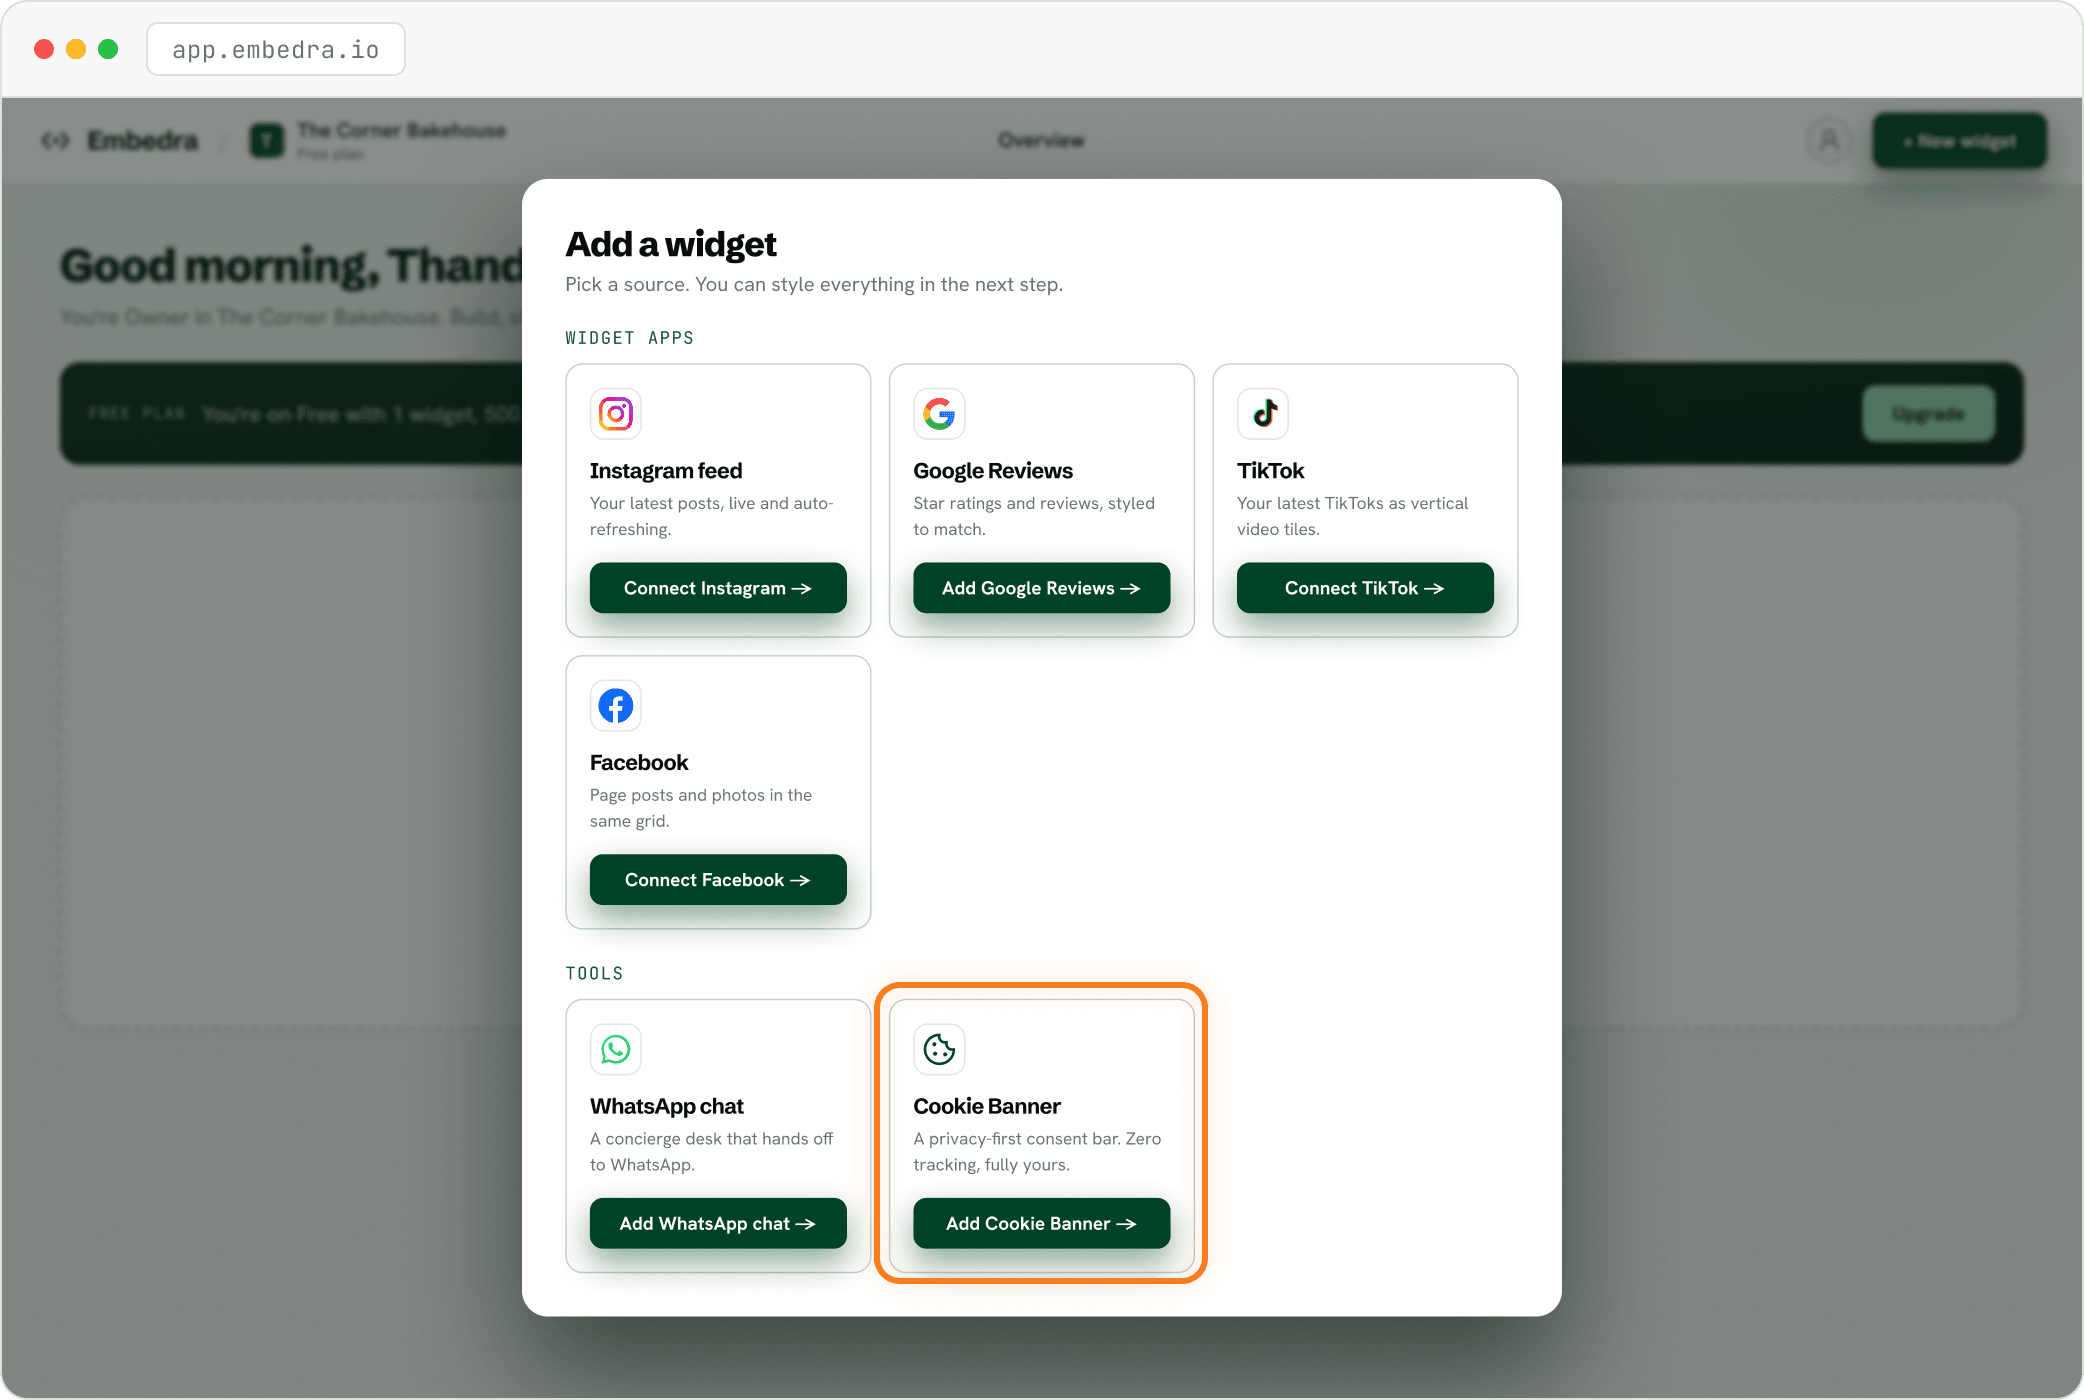
Pick "Cookie Banner"
Find the Cookie Banner card and click "Add Cookie Banner →".
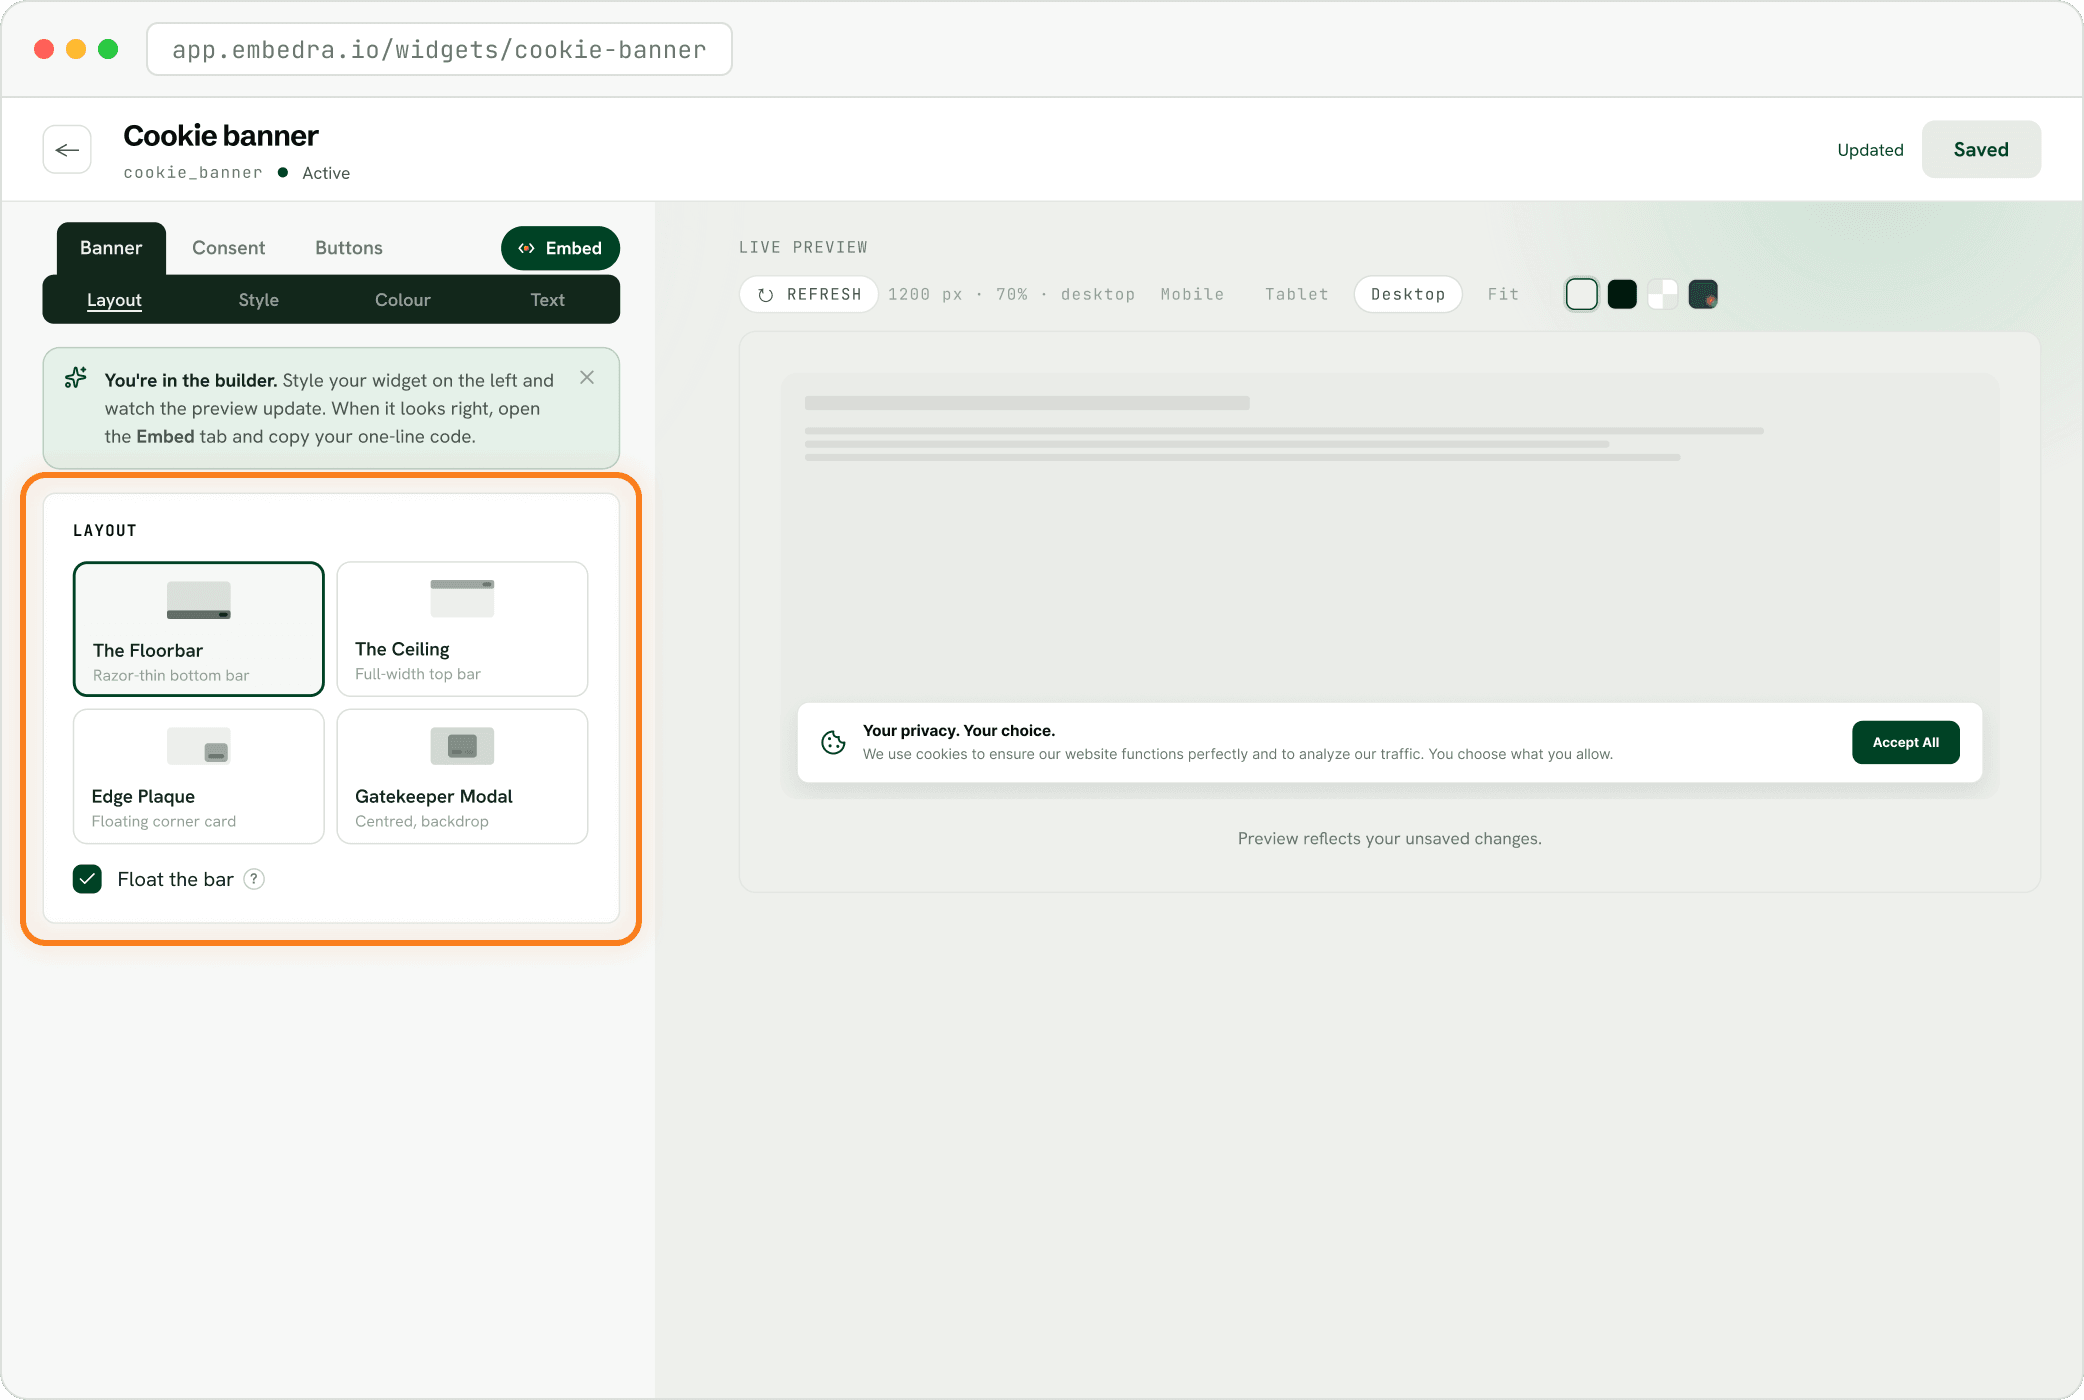
Choose where it sits
The builder opens with a banner that already works: "Your privacy. Your choice." Under Banner, then Layout, pick The Floorbar (thin bar at the bottom), The Ceiling (bar at the top), Edge Plaque (card in a corner) or Gatekeeper Modal (centred, page dimmed behind it).
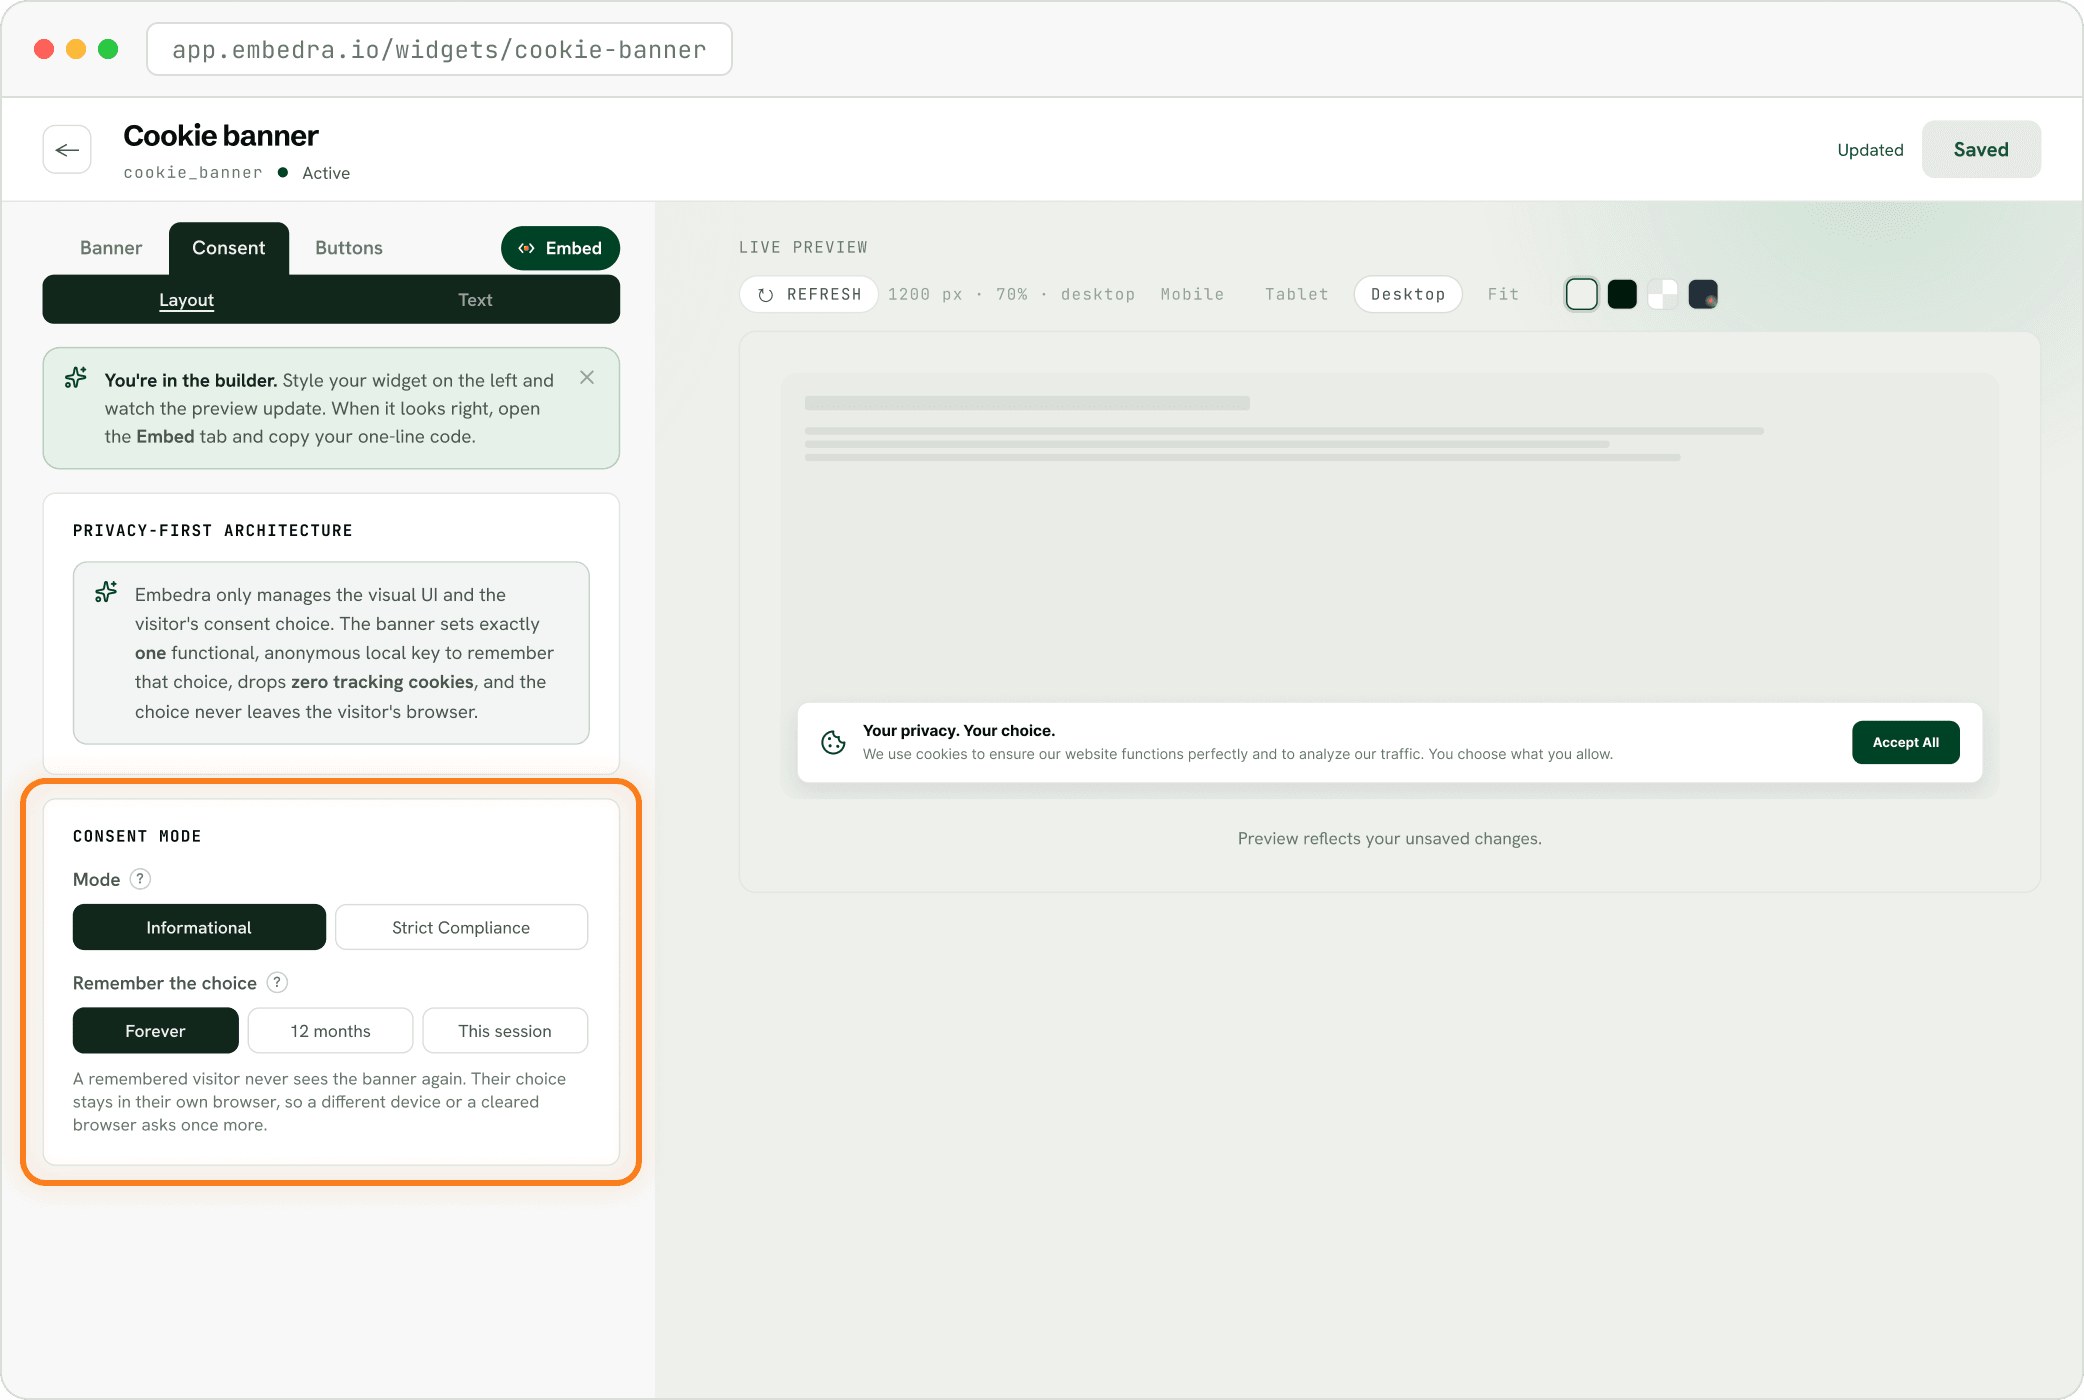
Choose how strict it is
Open Consent. Under "CONSENT MODE", pick Informational or Strict Compliance, and how long to remember a visitor's choice: Forever, 12 months or This session. Change the words under Banner, then Text, and the buttons under Buttons.
- Tip
Add your privacy policy link
Open Consent, then Text. Under "PRIVACY POLICY", paste the link to your policy page. The banner shows "Read our policy" as soon as there is a link to point at.
Save, then copy your code
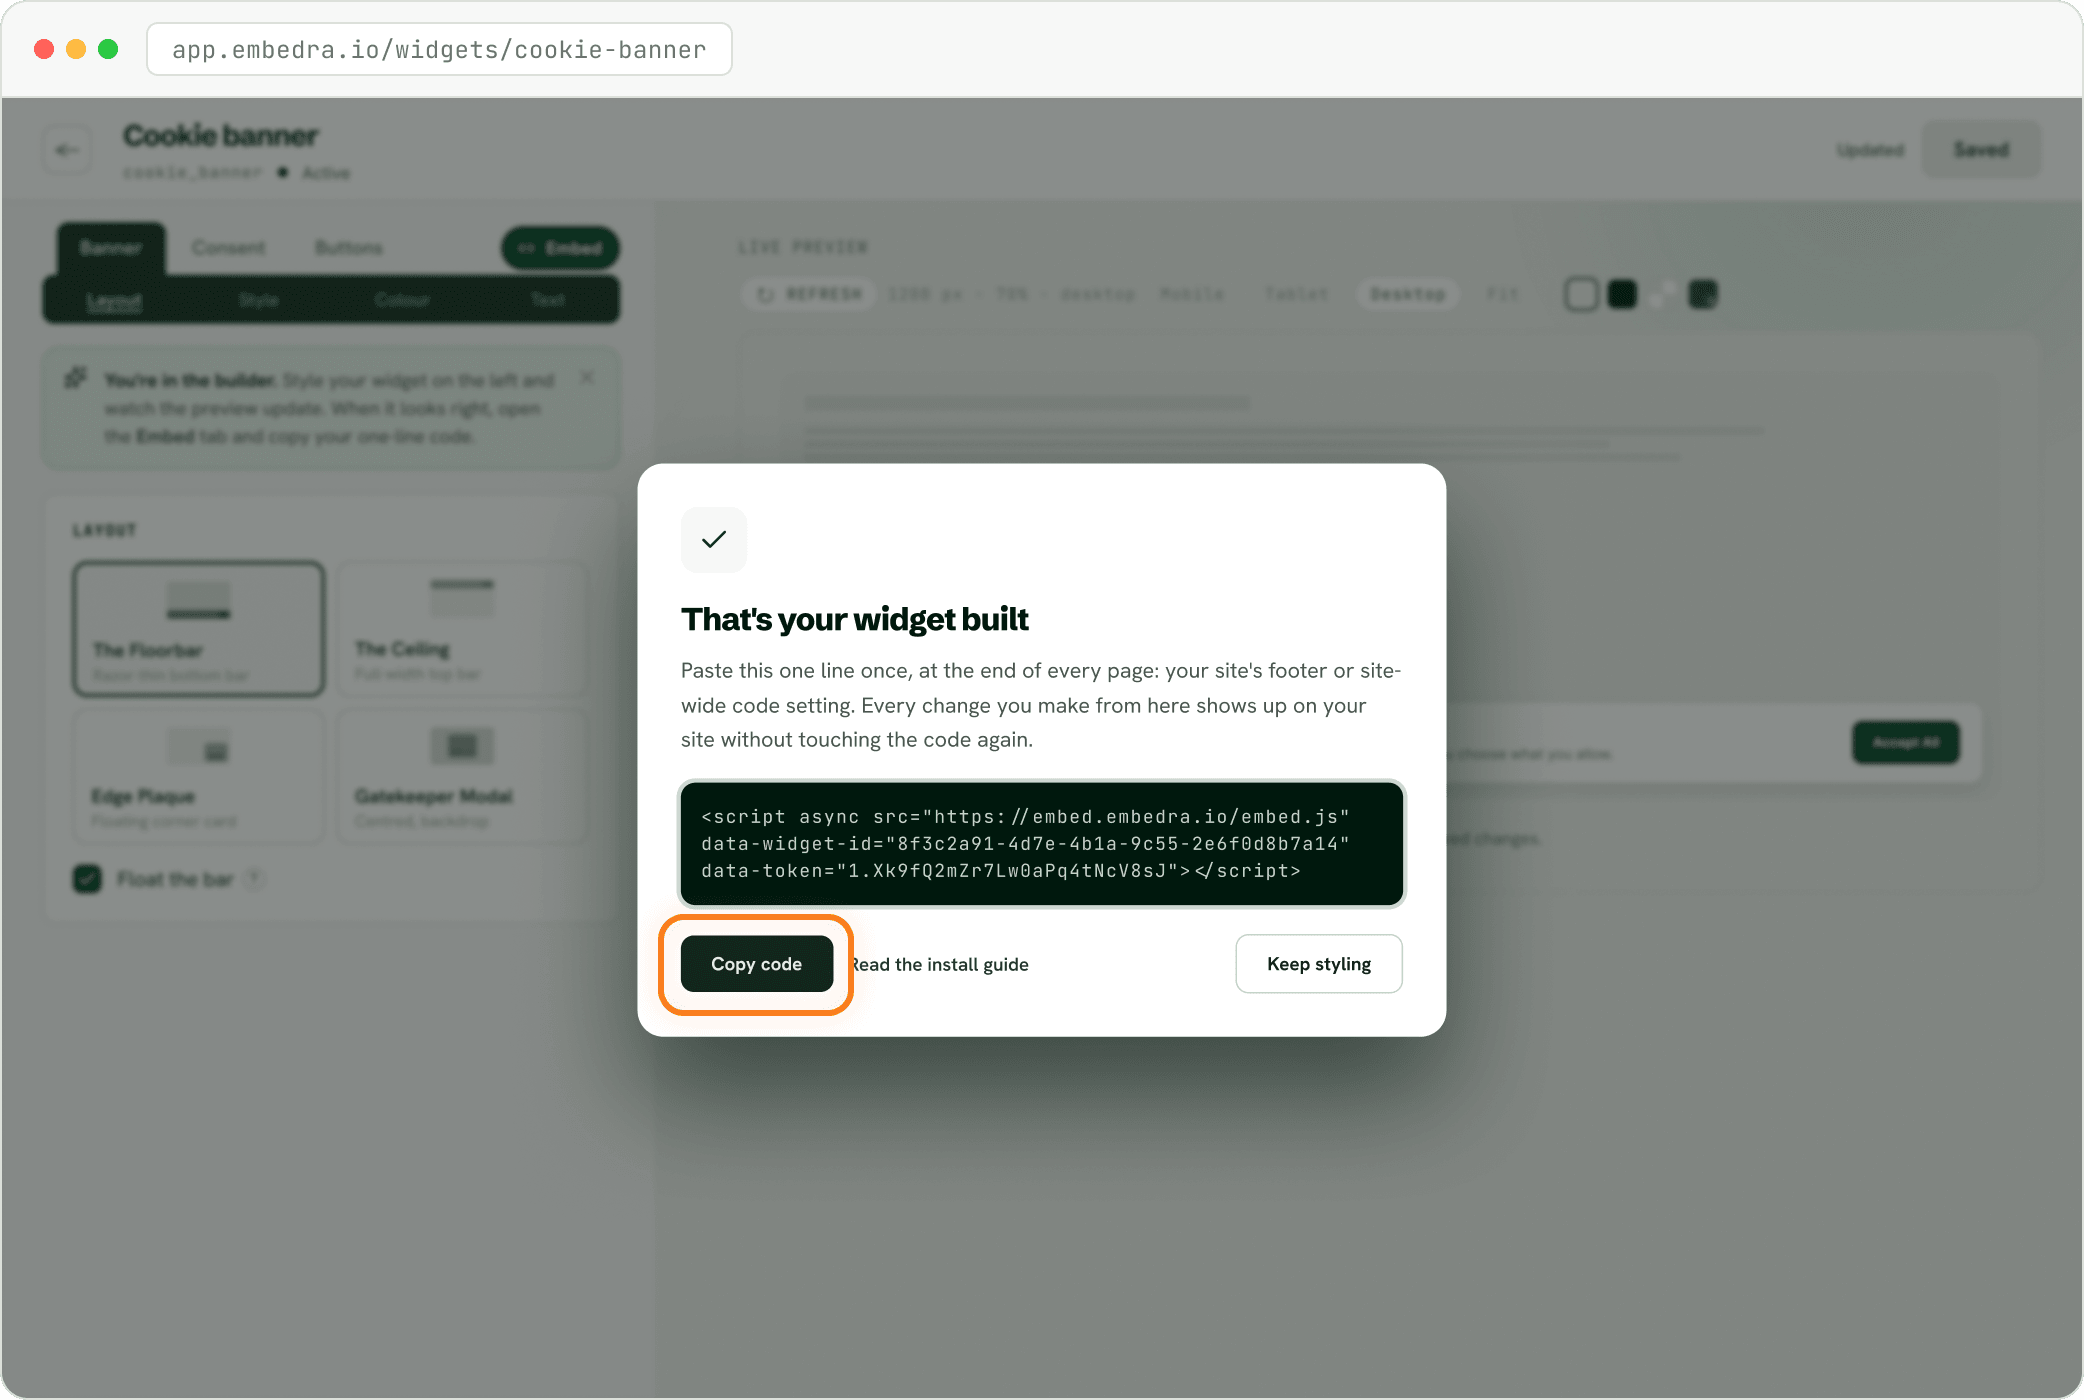
Click "Save changes" at the top right. The first time you save a new widget, "That's your widget built" opens. Click "Copy code": that one line is your whole widget. Next, follow the install guide for your website builder.
- Heads up
Paste it on every page
A cookie banner belongs on every page of your site. In your install guide, follow the "On every page" steps, not the block on one page.
Using Google Analytics or a Meta Pixel? (optional)
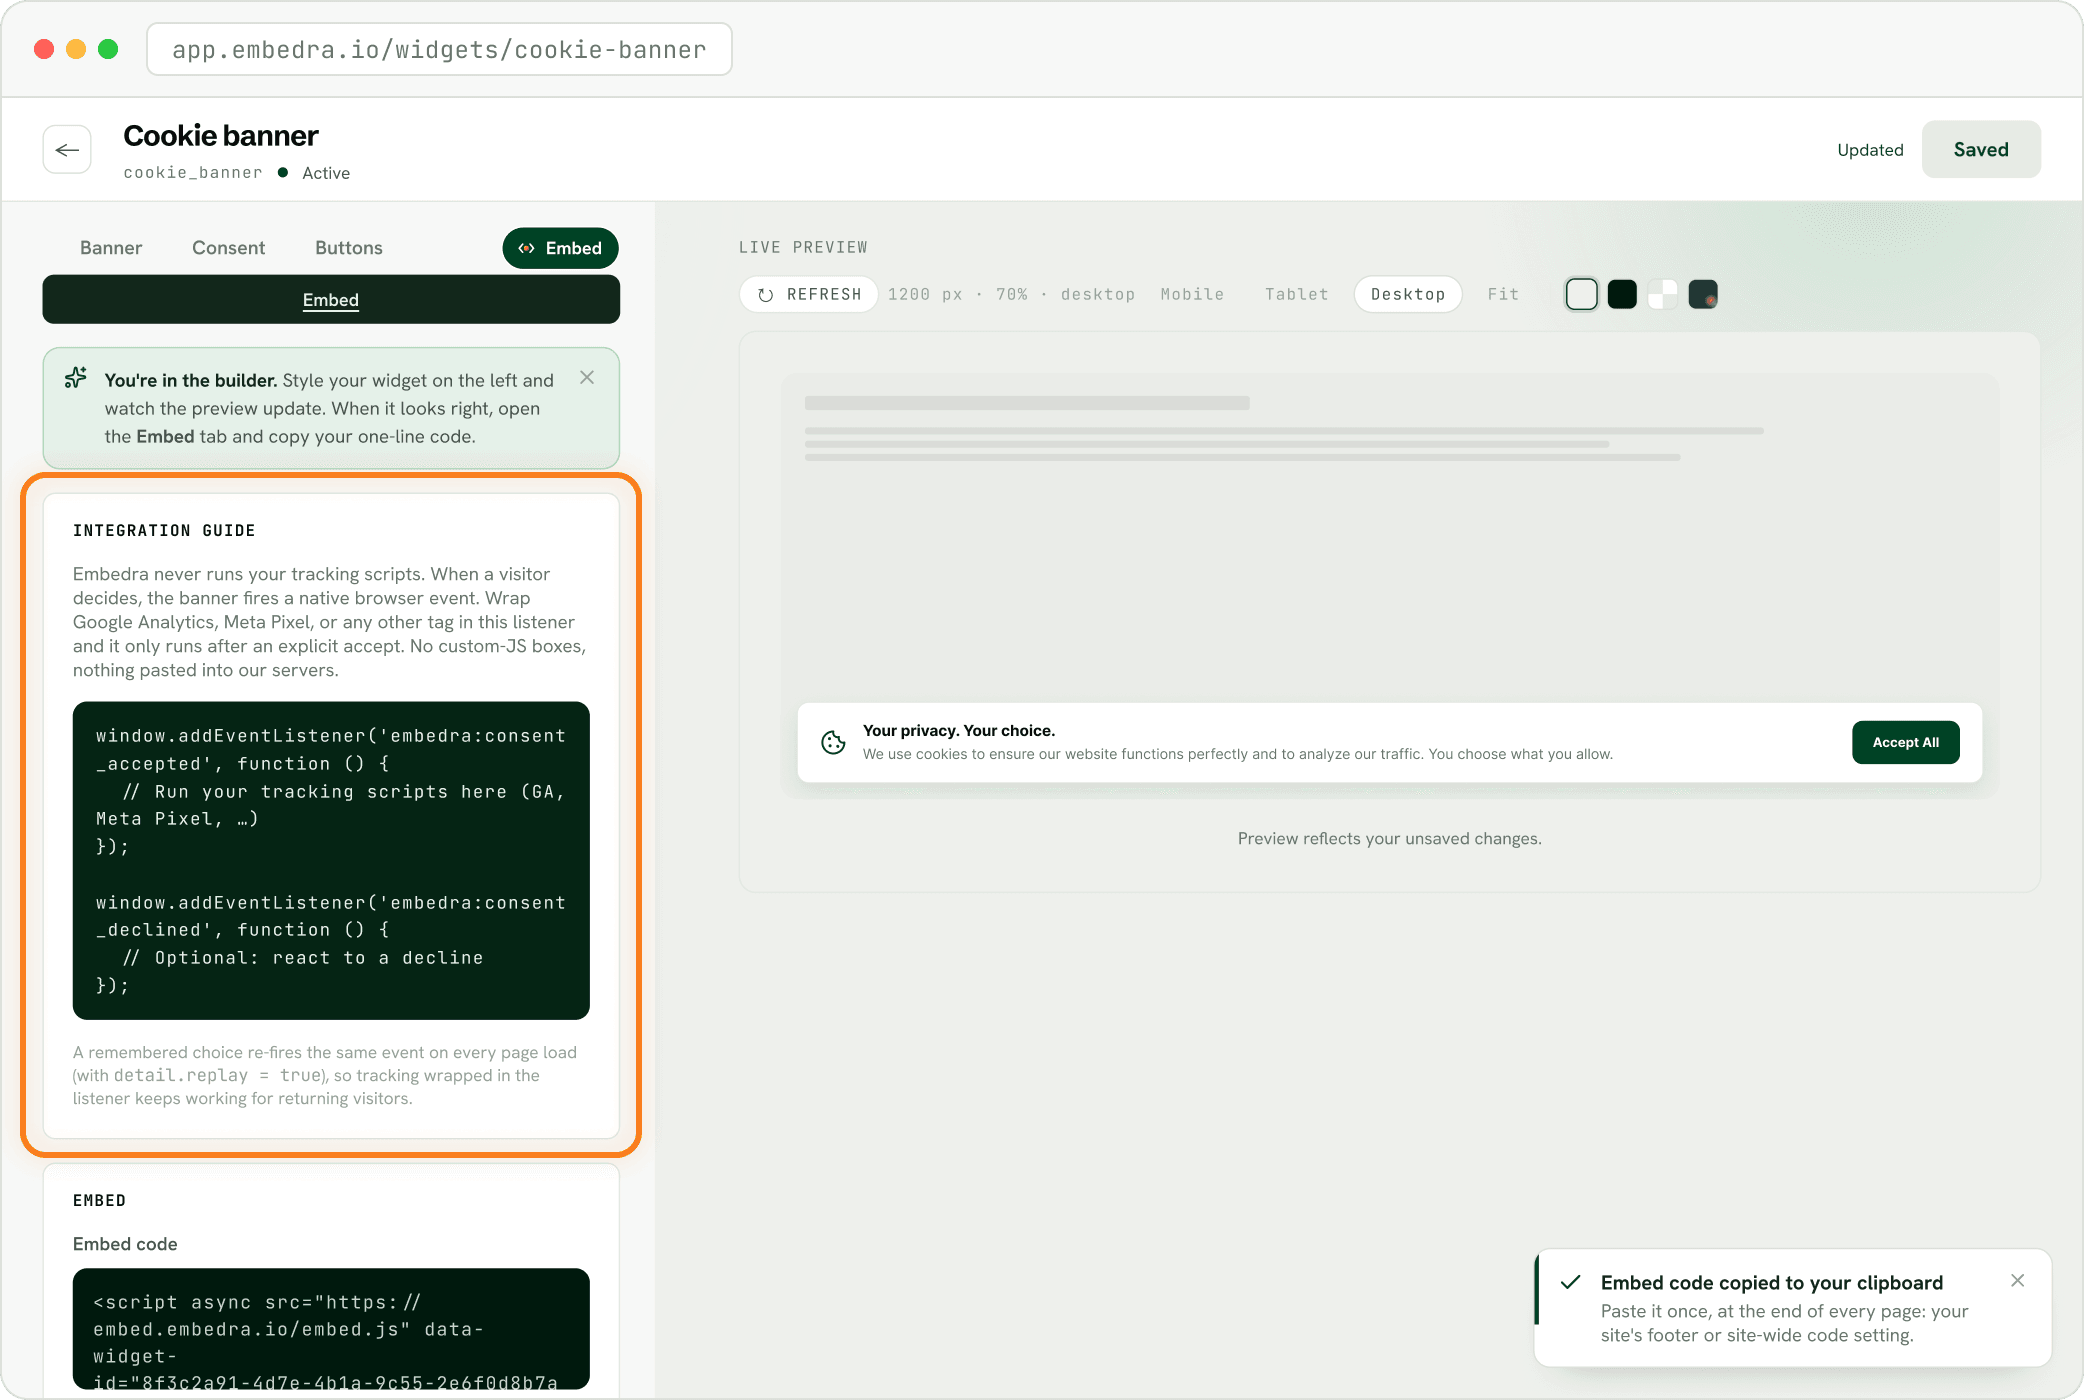
Open Embed and read "INTEGRATION GUIDE". Embedra never runs your tracking scripts. Copy the example there and put your tracking code inside it, so it only runs after a visitor clicks accept.
NEXT
Add your widget to your website →Where to paste your code in WordPress, Shopify, Webflow, Framer, Wix and more.
Stuck on a step? Email support@embedra.io. A real person replies.